pgAdmin4 is a powerful web-based administration tool for managing PostgreSQL databases. This guide will walk you through the steps to set up and use pgAdmin4 with a hosted Postgres database, enabling you to perform various database operations efficiently.
Table of Contents
Setting Up pgAdmin4
-
Download and Install pgAdmin4: If you haven't already, download pgAdmin4 from the official website. Follow the installation instructions for your operating system.
-
Launch pgAdmin4: Open pgAdmin4 from your applications menu or web browser.
Provisioning a Serverless Postgres
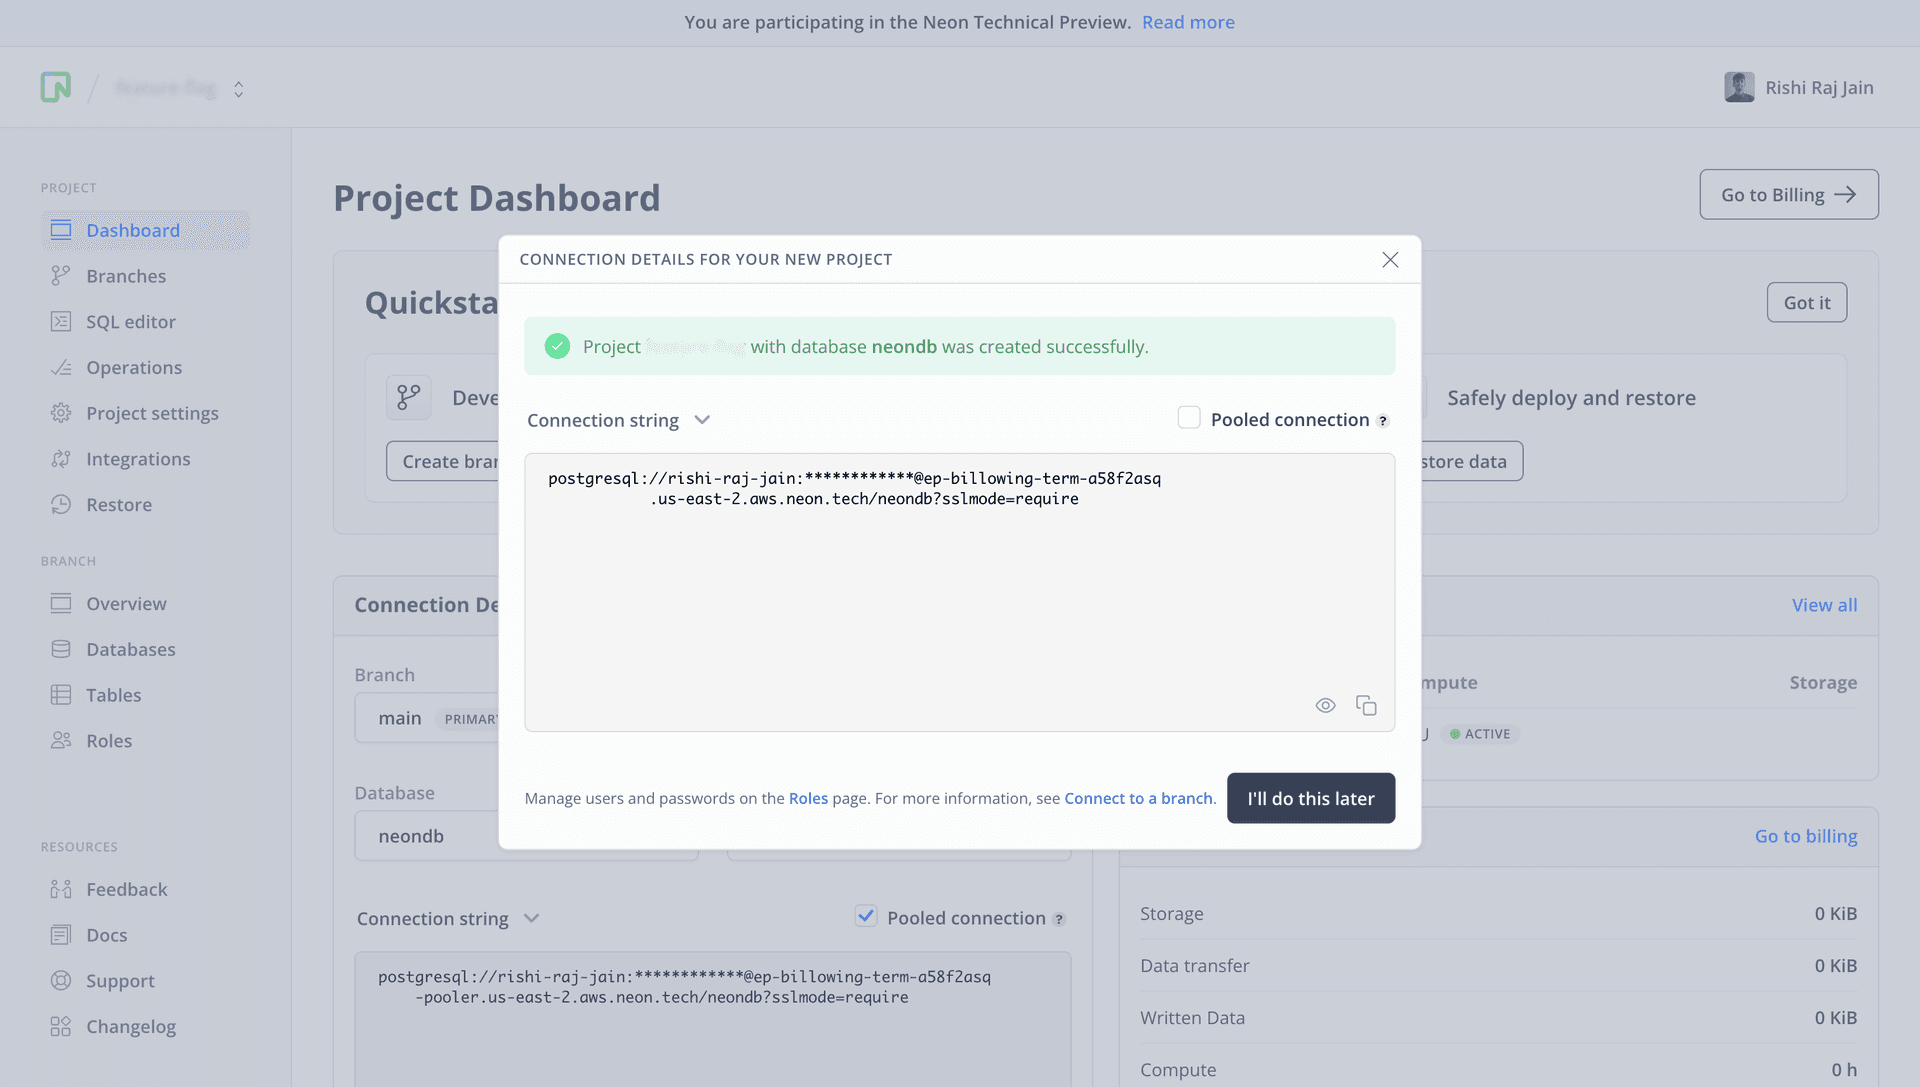
To get started, go to the Neon console and enter the name of your choice as the project name.

All Neon connection strings have the following format:
postgres://<user>:<password>@<endpoint_hostname>.neon.tech:<port>/<dbname>useris the database user.passwordis the database user’s password.endpoint_hostnameis the host with neon.tech as the TLD.portis the Neon port number. The default port number is 5432.dbnameis the name of the database. “neondb” is the default database created with each Neon project.?sslmode=requirean optional query parameter that enforces the SSL mode while connecting to the Postgres instance for better security.
You will be using these connecting string components further in the guide. Proceed further in this guide to connect pgAdmin4 to your Postgres.
Connecting to Your Hosted Postgres Database
-
Open pgAdmin4: Once pgAdmin4 is running, you will see the dashboard.
-
Create a New Server Connection:
- Right-click on "Servers" in the left sidebar and select "Create" > "Server...".
- In the "Create - Server" dialog, enter a name for your server connection.
-
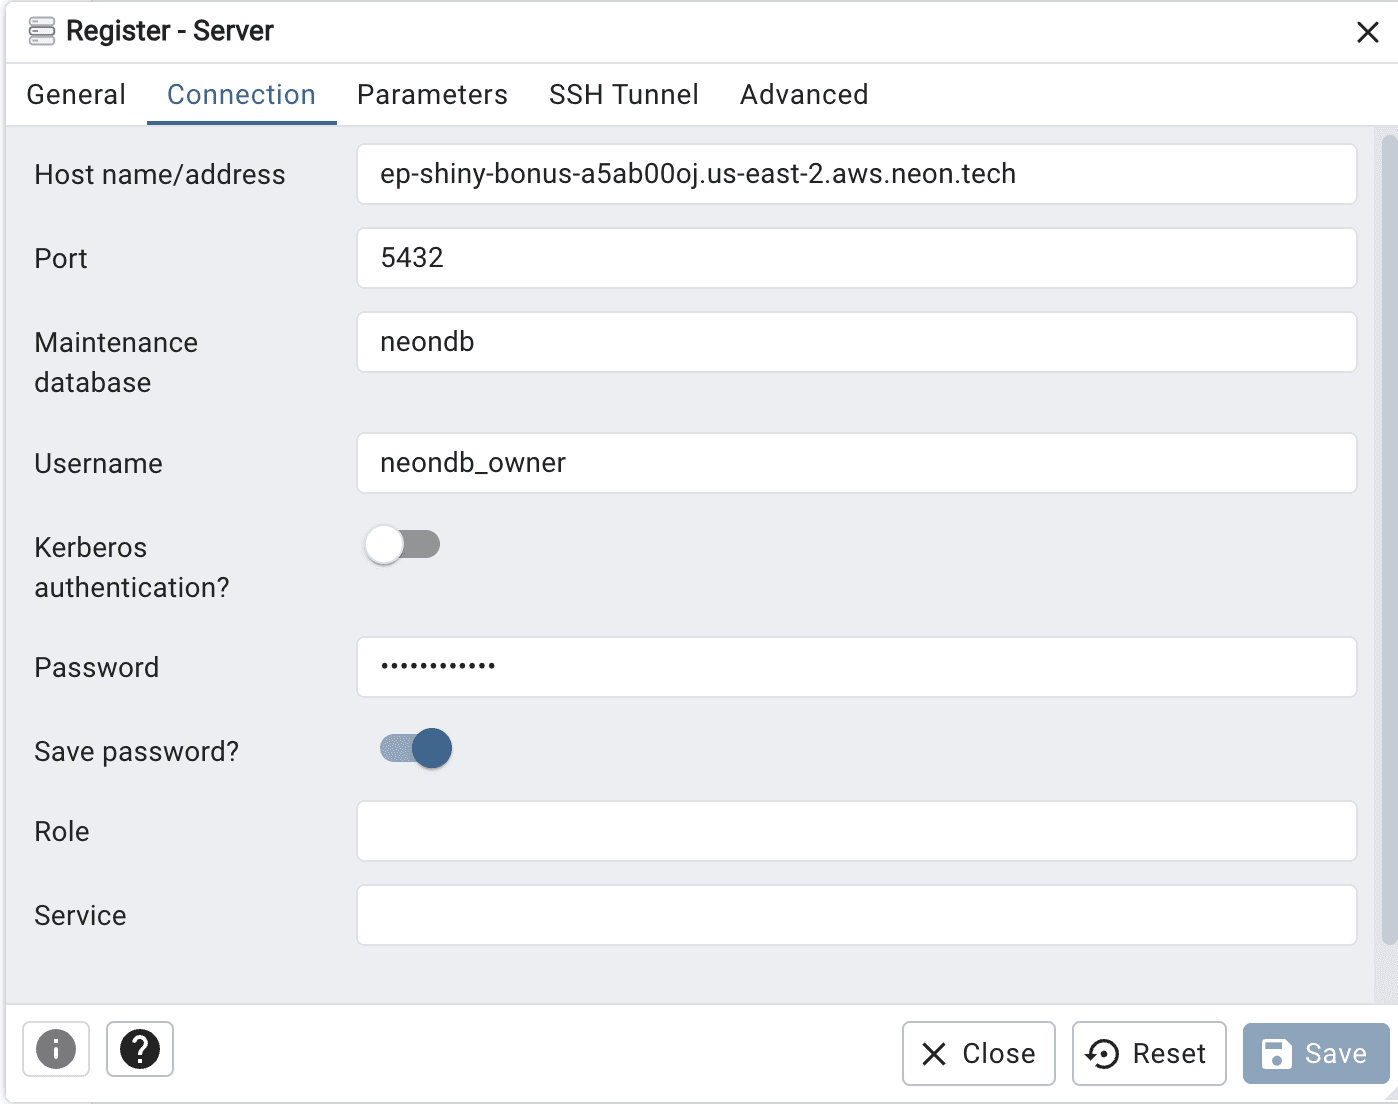
Configure Connection Settings:
- Go to the "Connection" tab.
- Enter the following details:
- Host: The endpoint of your hosted Postgres database (e.g.,
ep-...us-east-2.aws.neon.tech). - Port: The port number (default is
5432). - Maintenance database: Your database name.
- Username: Your database username.
- Password: Your database password (you can save the password if desired).
- Host: The endpoint of your hosted Postgres database (e.g.,
-
Save the Connection: Click "Save" to create the server connection. You should now see your server listed in the left sidebar.

Basic Operations in pgAdmin4
1. Running SQL Queries
- Click on your database in the left sidebar.
- Click on the "Query Tool" icon (or right-click the database and select "Query Tool").
- Enter your SQL queries in the editor and click the "Execute" button (play icon) to run them.
2. Managing Tables
- Expand your database in the left sidebar, then expand the "Schemas" > "public" > "Tables" section.
- Right-click on "Tables" to create a new table or manage existing ones.
3. Importing and Exporting Data
- To import data, right-click on a table and select "Import/Export".
- Follow the prompts to upload a CSV file or export data to a file.
Conclusion
pgAdmin4 is an essential tool for managing your hosted Postgres database. With its user-friendly interface, you can easily perform various database operations, from creating databases and tables to running complex queries. By following this guide, you should be well-equipped to utilize pgAdmin4 effectively.
Need help?
Join our Discord Server to ask questions or see what others are doing with Neon. Users on paid plans can open a support ticket from the console. For more details, see Getting Support.